Key Takeaway
Discover the transformative power of Malasana (Squat Pose), a yoga squat that not only opens your hips and improves digestion but also enhances posture and grounding, making it ideal for desk workers and pregnant women alike.
| YOGA SQUAT | |
|---|---|
| Alternate name: | Malasana |
| Difficulty level: | Beginner |
| Pose category: | Squatting |
| Muscle groups: | Gluteus maximus (buttocks) Quadriceps (thighs) Adductors (inner thighs) Hamstrings (back of thighs) Hip flexors (hips) Abdominals (core) Erector spinae (back) Gastrocnemius & Soleus (calves) |
| Physical benefits: | Improves flexibility and digestion; relieves low back pain. |
| Therapeutic applications: | Hip opening, improved digestion. |
| Preparatory poses: | Low Lunge (Anjaneyasana) Warrior I (Virabhadrasana I) Warrior II (Virabhadrasana II) |
| Counterposes that follow well: | Forward Fold (Uttanasana) Downward Dog (Adho Mukha Svanasana) Child's Pose (Balasana) |
| Chakras activated: | Sacral Chakra (Svadhishthana Chakra) |
| Most helpful prop: |  Yoga block under hips - supports alignment, eases tension. See latest price |
Whether you’re trying to soothe an upset stomach or tone your leg muscles, a yogi squat offers quick relief and a deep stretch. This classic deep squat yoga pose offers a range of benefits for your body and is even safe for pregnant women. Also called Malsana, this is one of the best yoga poses for opening up your hips and relieving low back pain. It targets the Sacral chakra, which opens up the flow of creative and romantic energy.
If you want to add Malasana (Garland Pose), aka yoga squat, to your yoga practice, here is everything you need to know about safely performing this asana.
You will want some squat-proof, non-see-through leggings before diving into this groin-revealing pose!
Contents
- 1 What is a Yoga Squat?
- 2 What is Yoga Squat Good for? Pose Benefits of Malasana (Garland Pose)
- 3 Step-By-Step Instructions
- 4 Tips for Mastering the Pose
- 5 Common Mistakes
- 6 Modifications and Variations
- 7 Safety and Precautions
- 8 Teaching the Pose: Help Your Students with These Cues
- 9 Preparatory Poses
- 10 Counter Poses
What is a Yoga Squat?
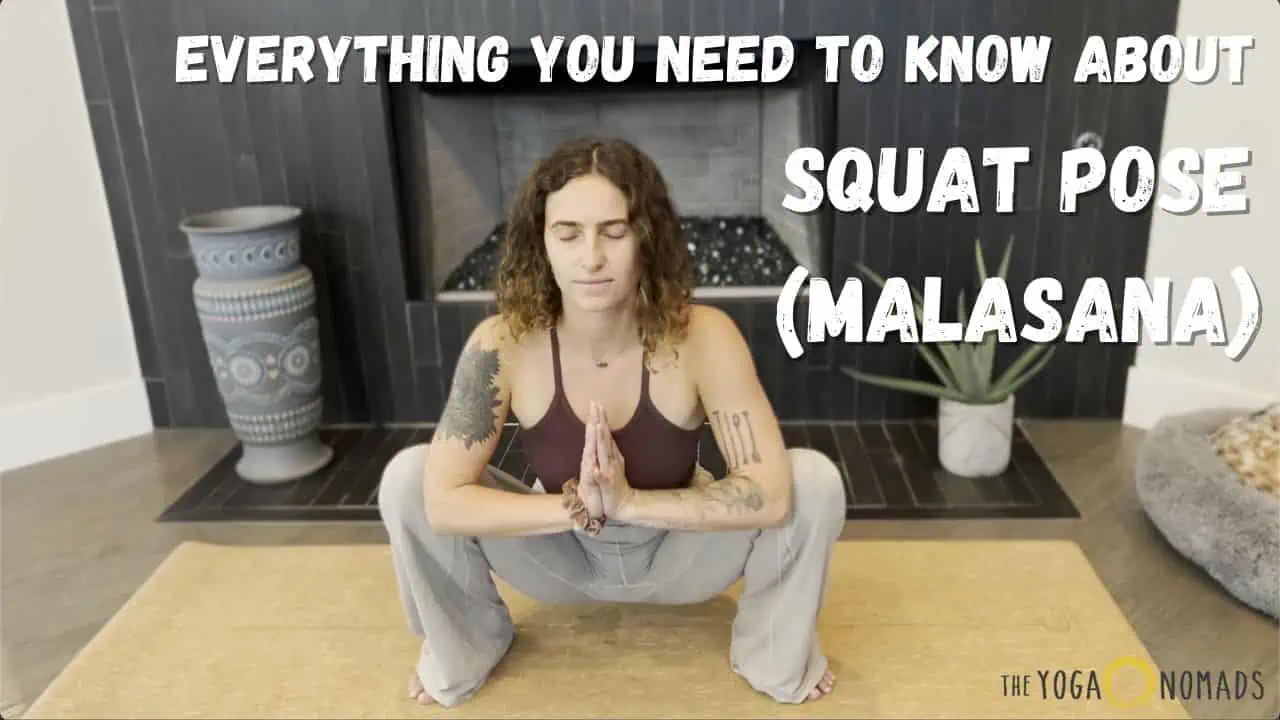
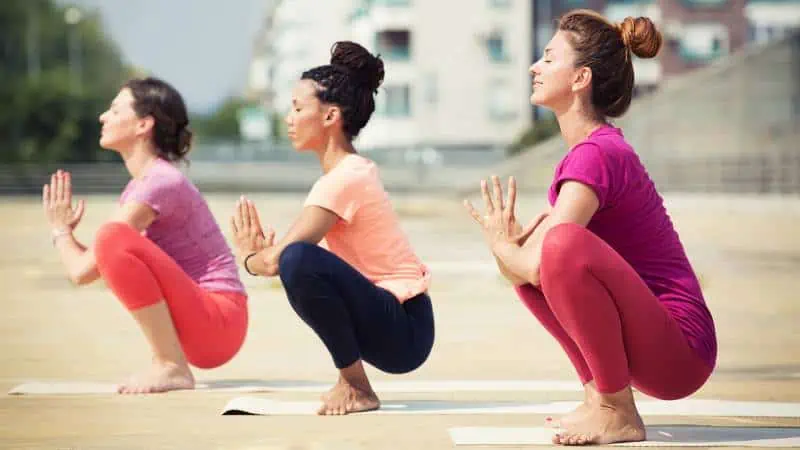
As one of the best hip openers Garland Pose or “yogi squat” is like the deeper, more flexible cousin of a conventional squat. Instead of stopping when your knees and hips reach 90 degrees, a yoga squat keeps dropping downward until your tailbone hovers above the floor. In its full expression, the yoga squat results in your hips dropping down by your ankles and your hip flexors deeply stretching. You place your hands in the prayer position at the heart center and use your elbows to gently push your knees apart for a deeper hip opening.
What is Yoga Squat Good for? Pose Benefits of Malasana (Garland Pose)
Malasana Pose has some impressive benefits for the entire body. These are especially noticeable for people who spend a lot of time seated at a desk or for pregnant women experiencing aches and pains. Practicing Malasana on a daily or weekly basis can dramatically improve your flexibility, stress relief, and even your digestion.
The main benefits of a yoga squat include:
- Hip opening: People with very sedentary lifestyles are more likely to have tight hips and lower back pain. This pose is a tried-and-true hip opener that reduces tension in the groin and hip region. Ancient yoga traditions say that a lot of stress and negative emotions can be stored in your hips. This pose helps release that stagnation!
- Better digestion: When you practice Malasana, your digestive system is aligned in a way that helps release gas and move food through the GI tract. This may not come as a surprise since the deep squat feels a lot like going number two. Malasana relieves pressure in your lower abdomen and can help with eliminating toxins.
- Better posture: Anyone who is chronically slumped over can benefit from the spinal alignment of this rejuvenating pose. As you balance your hips in the low squat position and bring your arms together, your posture is automatically corrected. Malasana provides so much relief for the back and spine.
- Grounding: This pose naturally calms you down and helps you feel more grounded amidst the stress and chaos of modern life. Unlike energizing, uplifting poses, Malasana brings you down back to Earth and helps you prepare for meditation or sleep.
Step-By-Step Instructions
If you want to enjoy all the benefits of this pose, you need to be sure that you can get into it with proper alignment. This beginner’s version of Malasana can be used at the end of a hip-opening yoga class or after a muscle-warming Sun Salutation sequence.
- Begin in Mountain Pose with your feet slightly wider than hip-width apart. Check that your spine is straight and your pelvis is tucked under (don’t arch your lower back to stick out your butt).
- Engage the glutes and splay your toes slightly outward at a diagonal angle.
- Inhale as you reach your arms overhead. On the exhale, begin squatting toward the mat.
- Keep your feet flat and your heels on the floor. If your heels lift, you can widen the stance so you can squat deeper between your knees.
- Continue to breathe as you slowly squat as deep as you can go. It’s OK if you can’t squat down.
- Bring your palms together at the heart center and let your knees splay wide to open your hips and groin.
- Hold the position and breathe deeply as you lightly press your elbows inside your knees to deepen the stretch.
- To exit, simply inhale, engage the glutes, and push into your feet to return to a standing position.
Tips for Mastering the Pose
Malasana Pose may look easy at first glance, but this modified squat can be tricky for beginners. You need the proper angle of your feet, knees, and tailbone to ensure that your body reaps all the benefits without risking energy. Use these simple tips for working towards a full expression of the yogi squat:
- Use your elbows: Whether you’re fully down toward the ground or your hips are hovering up around your knees, the elbows are an important tool for stabilizing this pose. Your elbows should press into your thighs or inner knees as your palms push together for leverage. Use a slight resistance to continuously push your knees outward (but don’t overextend them).
- Keep your spine straight: Malasana is only useful for posture if your back is straight. As the butt reaches down toward the floor, your entire spine can lengthen upward. Imagine two opposing ends of a stick reaching straight up through the top of your head and straight down through your tailbone.
- Engage your core muscles: Like most yoga poses, flexing the abdominal muscles helps protect your lower back and further straighten the spine.
- Don’t force your knee joint: If you have knee injuries or discomfort, be careful not to force the knees to splay out at an uncomfortable angle. When you feel pressure on the knees, avoid going any deeper. Try to widen your feet stance until the pressure is relieved.
- Push on the outside edges of your feet: The outsides of each foot act as the key stabilizers in this pose. Root the edges, pinky toe, big toe, and heels to the floor.
Common Mistakes
While this pose is beginner-friendly, you can still make several mistakes that could lead to injury or discomfort. Here are the most common Malasana mistakes and how to fix them:
- Rounded back: It’s natural to want to curve forward to try to find your center, but the Yogi Squat is designed to be performed with a completely aligned spine. A rounded back can be particularly harmful to your lumbar spine (lower back). To correct it, press your hands together in a prayer position and raise your elbows so they come more in contact with your thighs. Then, press outward into the inner leg. Let your tailbone drop straight to the mat and your pelvic floor open forward. If needed, use a block or modification below. Your gaze should be straight ahead and your core should be engaged.
- Heels lifting up: If the heels lift from the floor, you are likely putting too much weight in your toes and falling forward. To fix it, add a yoga wedge or yoga towel beneath for support.
- Feet not splayed: Beginners often keep their feet directly forward like a normal squat. Instead, imagine your toes pointing diagonally out to the corners of the room. This will ensure that your knees are externally rotated so you have room to kneel down between them.
Modifications and Variations
Getting into Yogi’s Squat is fairly simple, but it’s not accessible to everybody. If you don’t quite have the flexibility for the full variation, try these modifications:
Sit on Blocks
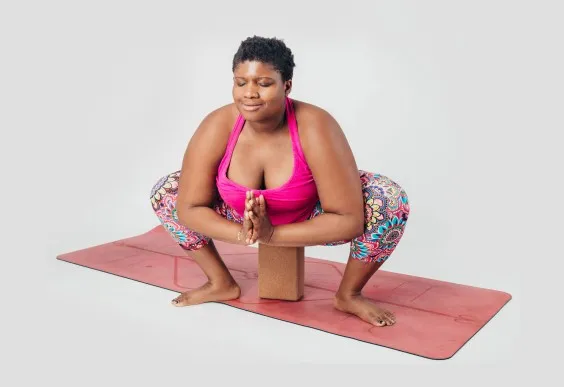
Yoga blocks always come to the rescue when you’re still working on flexibility. Garland pose can easily be modified by placing a yoga block length-wise beneath your tailbone and hips. It may look a little funny, but the added support for your hips drastically reduces back or knee pain.
Blanket Heel and Hip Support
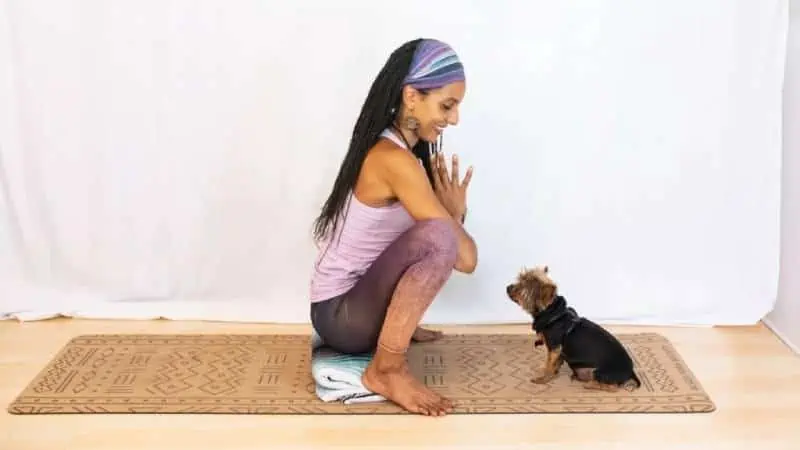
When your hips feel too tight to go all the way down, a yoga blanket is another way to buffer the distance between your body and the floor. Slightly lifting the heels also adjust the angle of your knees to reduce any joint pain. Place a folded or rolled blanket directly beneath your tailbone and squat on top of it. Shimmy your feet backwards until your heels are lifted on top of the blanket.
Blanket Between Thigh and Calf
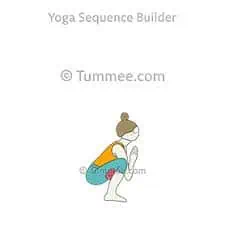
For even more knee pain relief, place a folded yoga blanket or towel between your knees and calf muscles. As you press bend the knees and press your thighs into your calves, the blanket cushions the backs of your knees. As you sink into the final pose, this can add more support and strengthen the thighs.
Bound Garland Pose
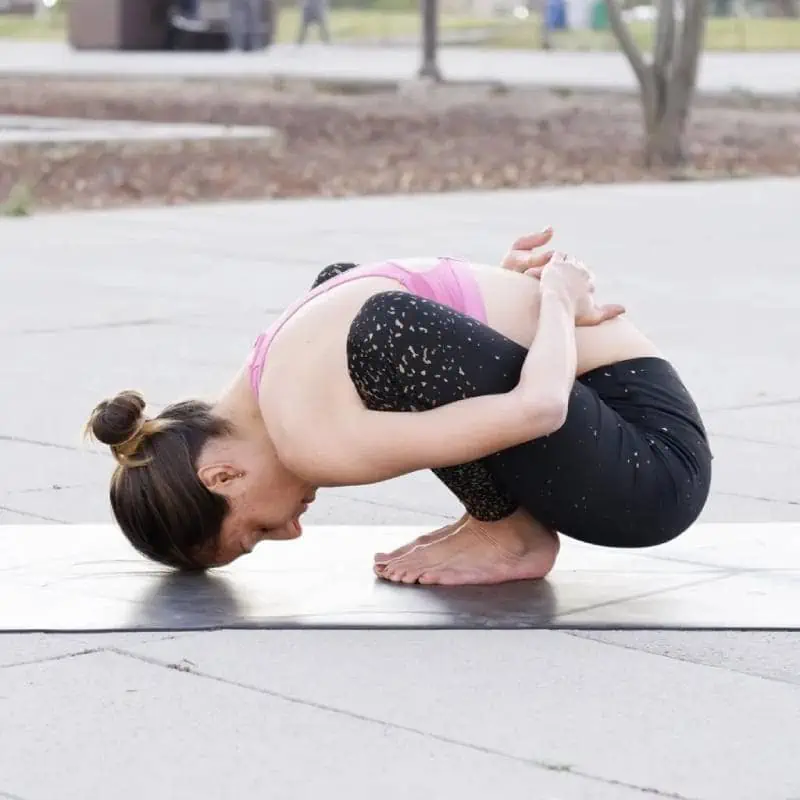
The most advanced version of garland pose involves bending forward, placing the forehead on the floor, and wrapping the arms back around your legs. Begin squatting down with your ankles and feet together. Then, widen your knees and fold your torso forward. On an exhale, wrap your arms back around your bent legs and rest your palms on the floor. Stretch your back and neck down and exhale to bring your forehead to the mat (optionally with a blanket underneath). One by one, lift your left arm and then your right to get your arms wrapped around the outer knees and clasped behind your lower back.
Safety and Precautions
Overall, Malasana is a fairly safe pose that doesn’t have many precautions. As long as you practice with your boundaries in mind, you should be fine doing this pose at home. However, pregnant yogis or people with preexisting injuries should only attempt this pose under the guidance of a registered yoga instructor. Remember:
- Don’t sink too deeply past your range of motion. Keep your hips hovering above the ground or use a block.
- Don’t put all your weight on one part of your foot. It should be spread out through your toes and your heels.
- Runners and athletes should not perform this pose immediately after intense cardio workouts because of the pressure on the ankles and calves.
Teaching the Pose: Help Your Students with These Cues
The way that a yoga teacher cues this pose makes a big difference for the students. Here is how to safely and clearly guide a yoga class into Malasana:
- Start standing in Mountain pose with your spine aligned straight and core engaged.
- Spread your feet slightly wider than hip distance and turn your toes outward at a 45 degree angle.
- On an exhale, slowly squat down until your tailbone reaches toward the floor. It’s OK to hover above at your flexibility range.
- Lean forward slightly and bring your hands to prayer position.
- Inhale and tuck your elbows into your inner thighs or knees, then gently press them apart.
- You can place a block underneath your hips to rest your tailbone as you stretch.
- Hold for 3-5 breaths, inhaling to lengthen your spine upward and exhaling to squat deeper.
- To exit the pose, reach forward and place your hands on the floor, then gently press your lower body up to end in a forward fold.
Preparatory Poses
Hip opening and joint-warming poses are the best asanas for preparing your body for the Garland posture. Before you squat down into a yogi squat, try:
- Low lunge
- Warrior I and Warrior II
- Sun salutations
- Pigeon pose
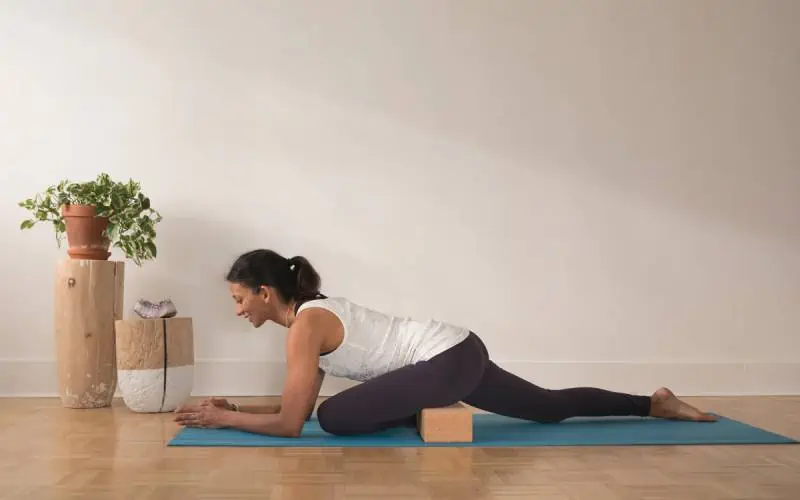
- Lizard pose
- Cow face pose
- Wide angle forward bend

Counter Poses
End your yoga squat practice with a few of these counter poses to give your hips a rest and release any leftover tension in the ankles and knees:
- Forward fold
- Downward dog
- Child’s pose
- Saddle pose
A yoga squat can drastically improve your yoga practice by helping you be more relaxed, flexible, and strong.
Namaste!


